Quick Links
The more you use your Windows 11 PC, the more important files and memories you gather. Whether you have photos, documents, videos, or even favorite apps, it's natural to want to back things up in the event something goes wrong with your PC. Thankfully, Windows 11 offers three different ways to back up your system. You can back up individual files with File History, copy folders to the cloud with OneDrive PC folder backup, or create a system image of your PC. We have a look at all three for you right here.
This guide will cover backing up files and apps. System settings are already backed up to the cloud through your Microsoft account on Windows 11.
Backup your PC with OneDrive PC folder backup
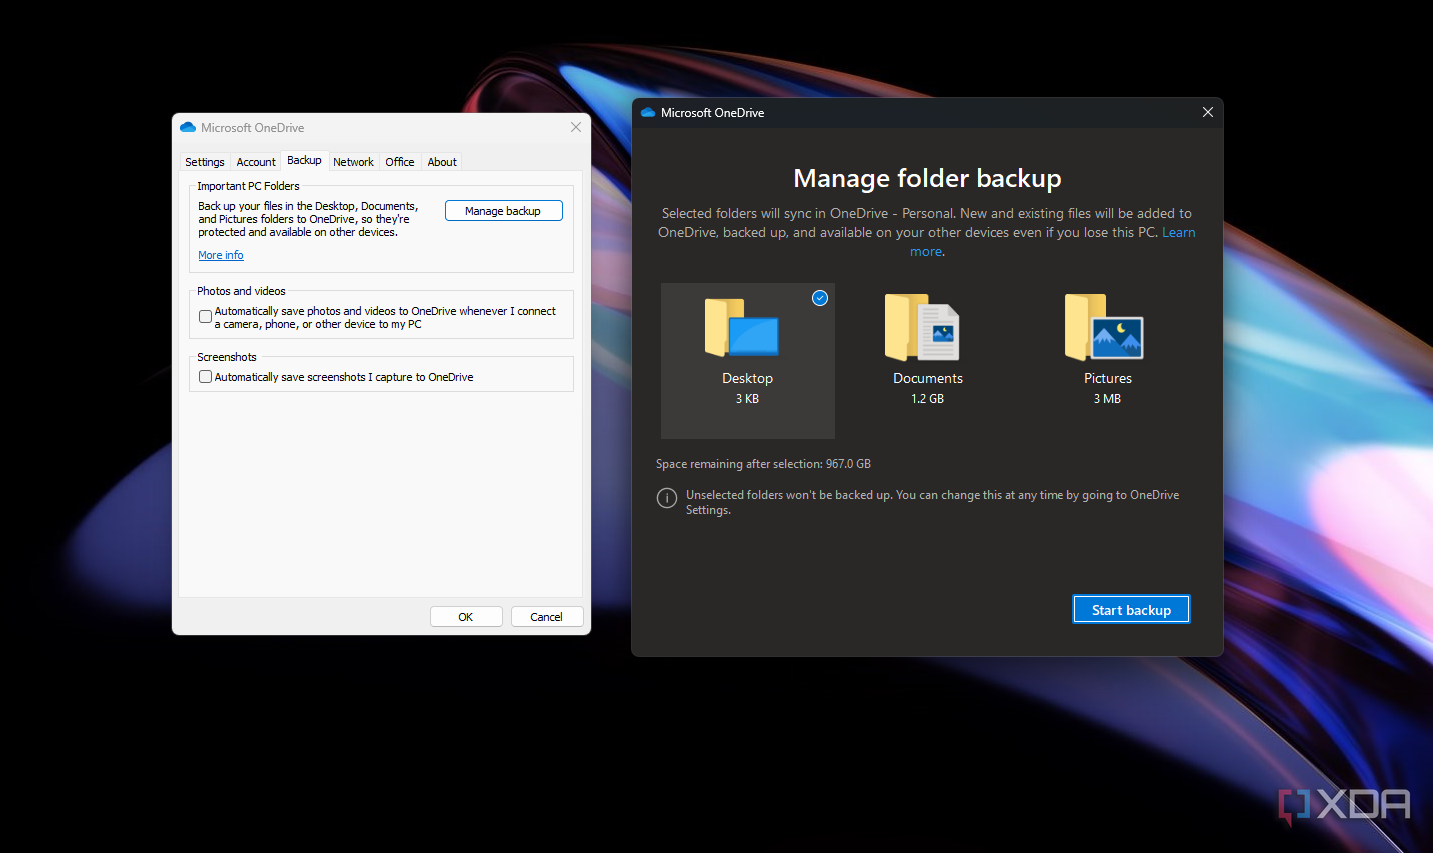
As long as you're comfortable uploading files to the cloud and you have a paid OneDrive subscription (or free storage space included as part of Microsoft 365), you can use the OneDrive app on Windows 11 to back up your PC's critical folders. These include anything you might have stored in the standard Desktop, Documents, Music, Pictures, and Videos folders. This backup happens automatically and is one of the simplest ways to back up your PC, but it will not back up applications.
- Install the OneDrive app if your PC doesn't already have it pre-installed.
- Open the OneDrive settings app by selecting the OneDrive cloud icon in the system tray.
- Select Help, then Settings.
- In the Sync and back up tab, select Manage Back up.
- You can back up the folders you see here. Just toggle any folder that says Not backed up and select Save. The folder will start backing up.
Once the backup is complete, files will begin to sync to all Windows 11 PCs you might own in the same locations. You also can access the files from OneDrive on the web.
Backup your PC with File History
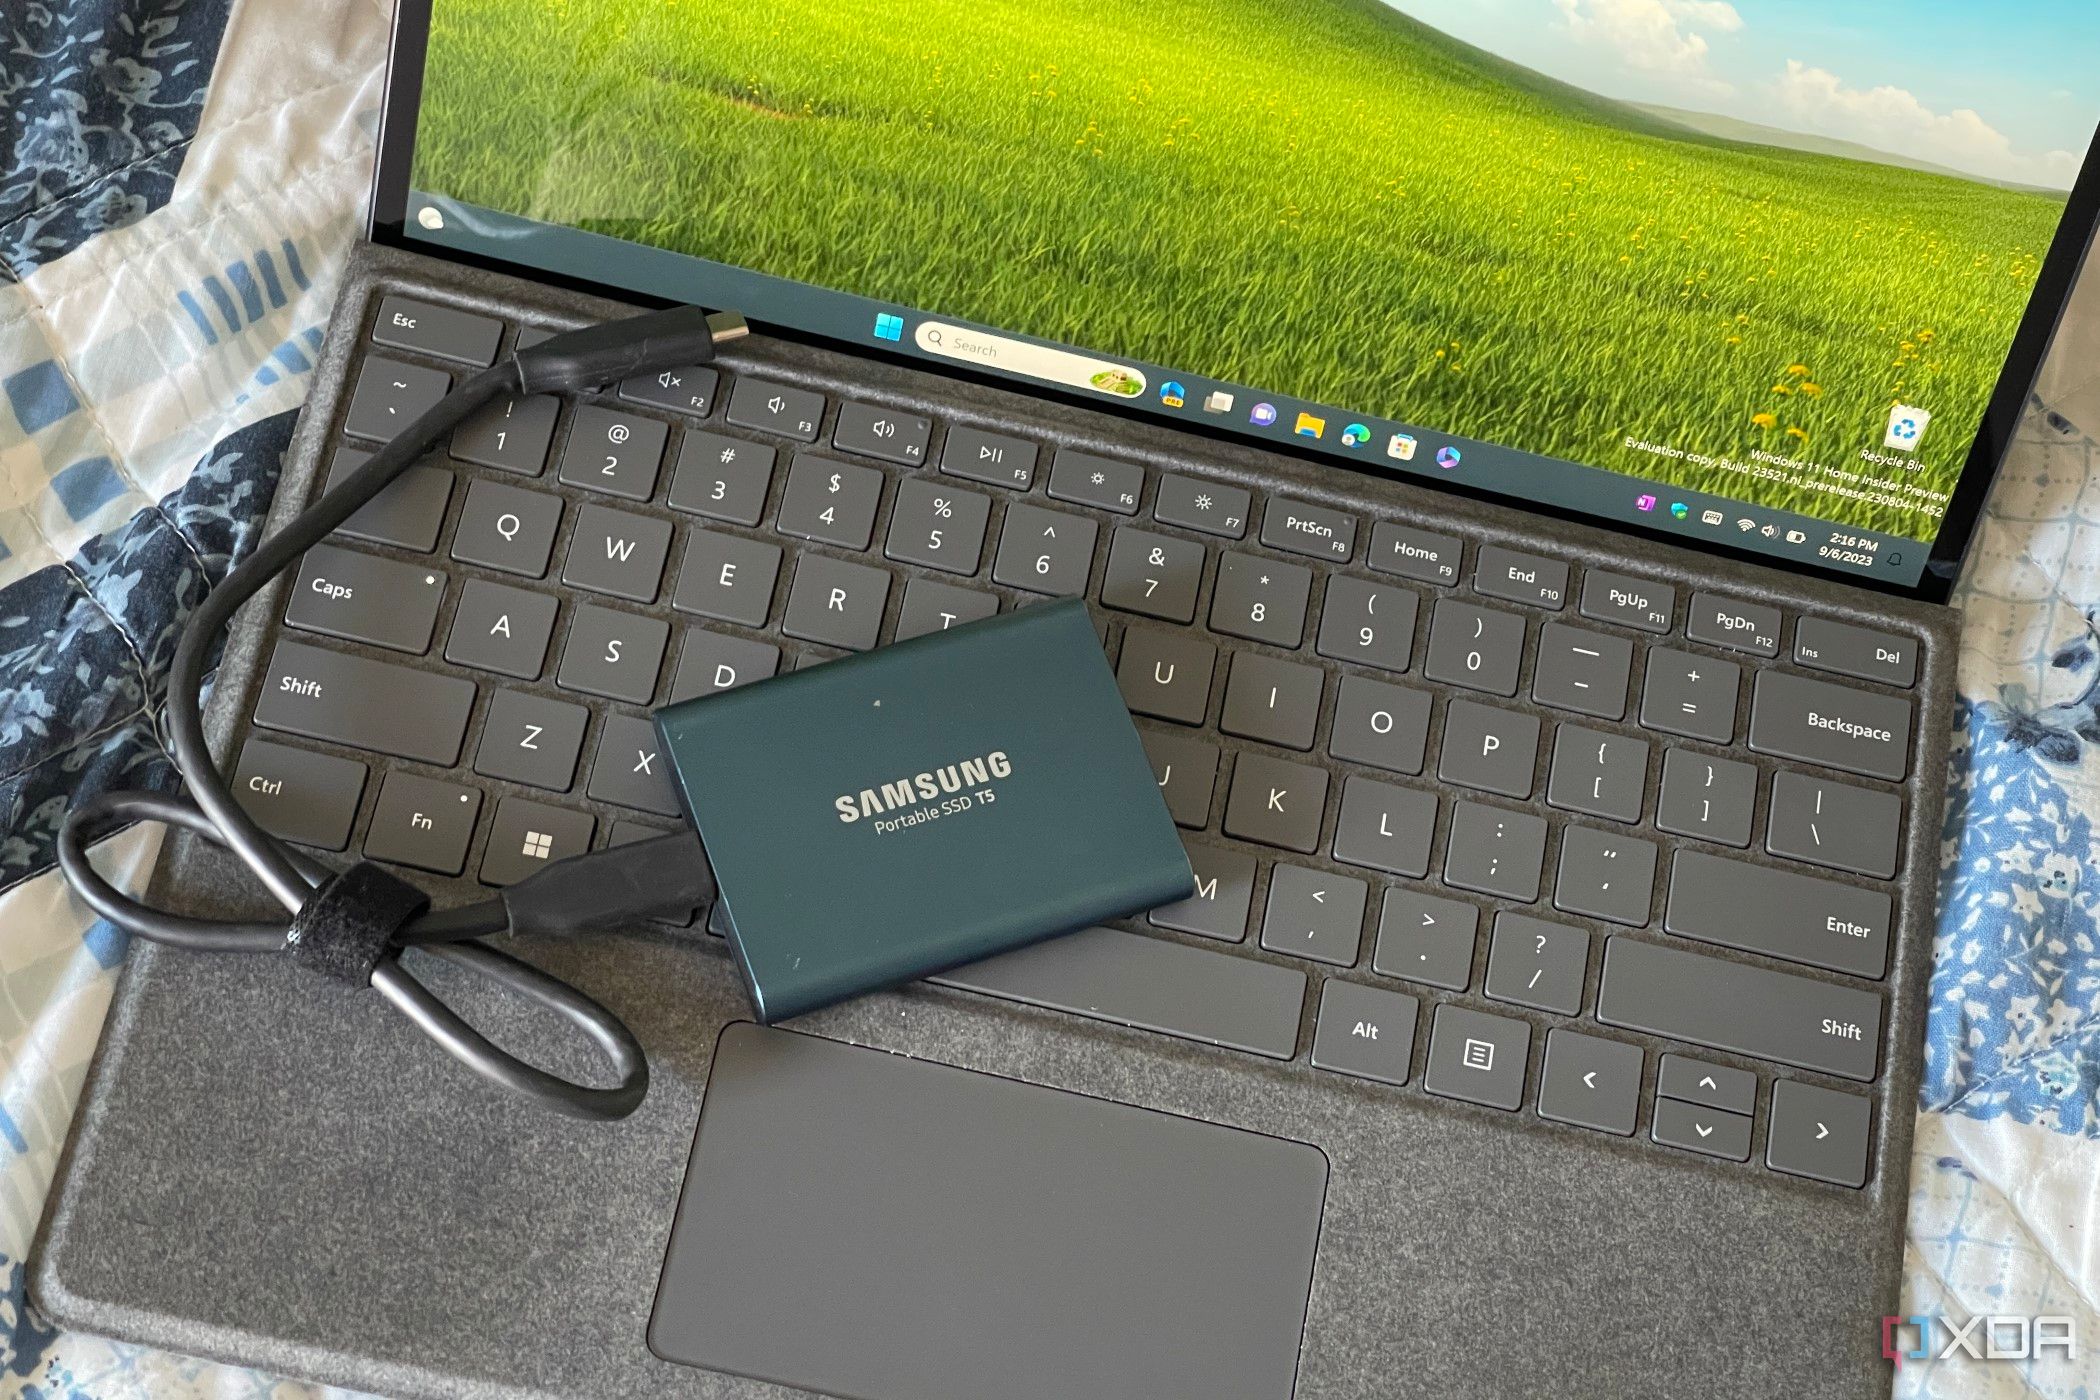
Another way to back up your PC is with File History. This function lets you pick and choose individual files and folders that you want to back up. In this option, you'll be using an external HDD or SSD connected to your PC. Note this does not back up applications.
- Connect the SSD or HDD where you want to store the backup.
- Search for and select Control Panel in the Start Menu.
- Switch it to Category view under View by.
- Under System and Security, choose Backup and Restore (Windows 7).
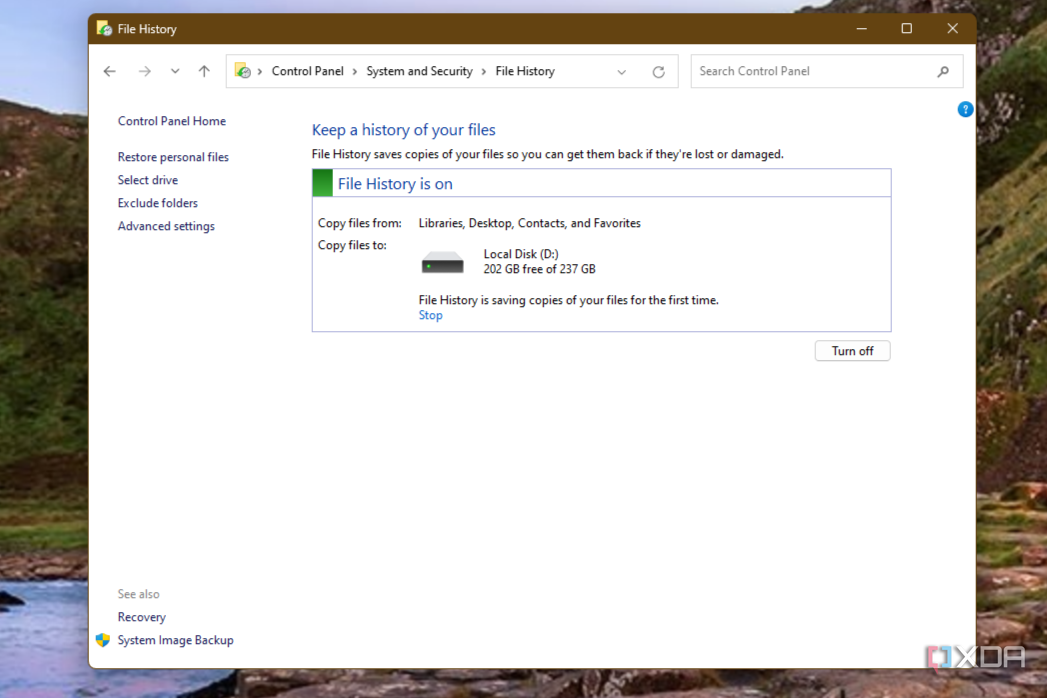
- At the bottom of the sidebar, choose File History.
- Make sure your connected SSD or HDD is on the list. And then choose Turn on.
Your PC will start backing up critical folders to this HDD or SSD. You can choose Exclude Folders in the sidebar and click Add to avoid backing up certain folders. You also can choose Advanced Settings to choose how often your PC will save copies of files or keep saved versions on the HDD or SSD. Since your PC will be monitoring these folders for changes, the caveat with this is that your HDD or SSD will have to be connected for these backups to stay fresh.
You can restore files you added to File History to any Windows PC. Just open the File History settings page and choose Select another backup to restore files from. You'll be prompted to select the files you want restored.
Backup your PC with a system image
Creating a system image is the most advanced way of backing up your PC. This method creates a carbon copy of your PC and is the best way to back up your PC. You'll be backing up all your apps, settings, and files exactly as they are on your PC. This option doesn't let you restore individual files, but it's helpful for when something goes horribly wrong with your PC, and you need a copy of how you left it once you reinstall Windows on the same hardware as before. You can create a system image to either an HDD or SSD, a DVD, or a network location.
How to start the system image backup
- Connect the SSD or HDD where you want to store your backup.
- Search for and select Control Panel in the Start Menu.
- Once the Control Panel is open, switch it to Category view under View by.
- Under System and Security, choose Backup and Restore (Windows 7).
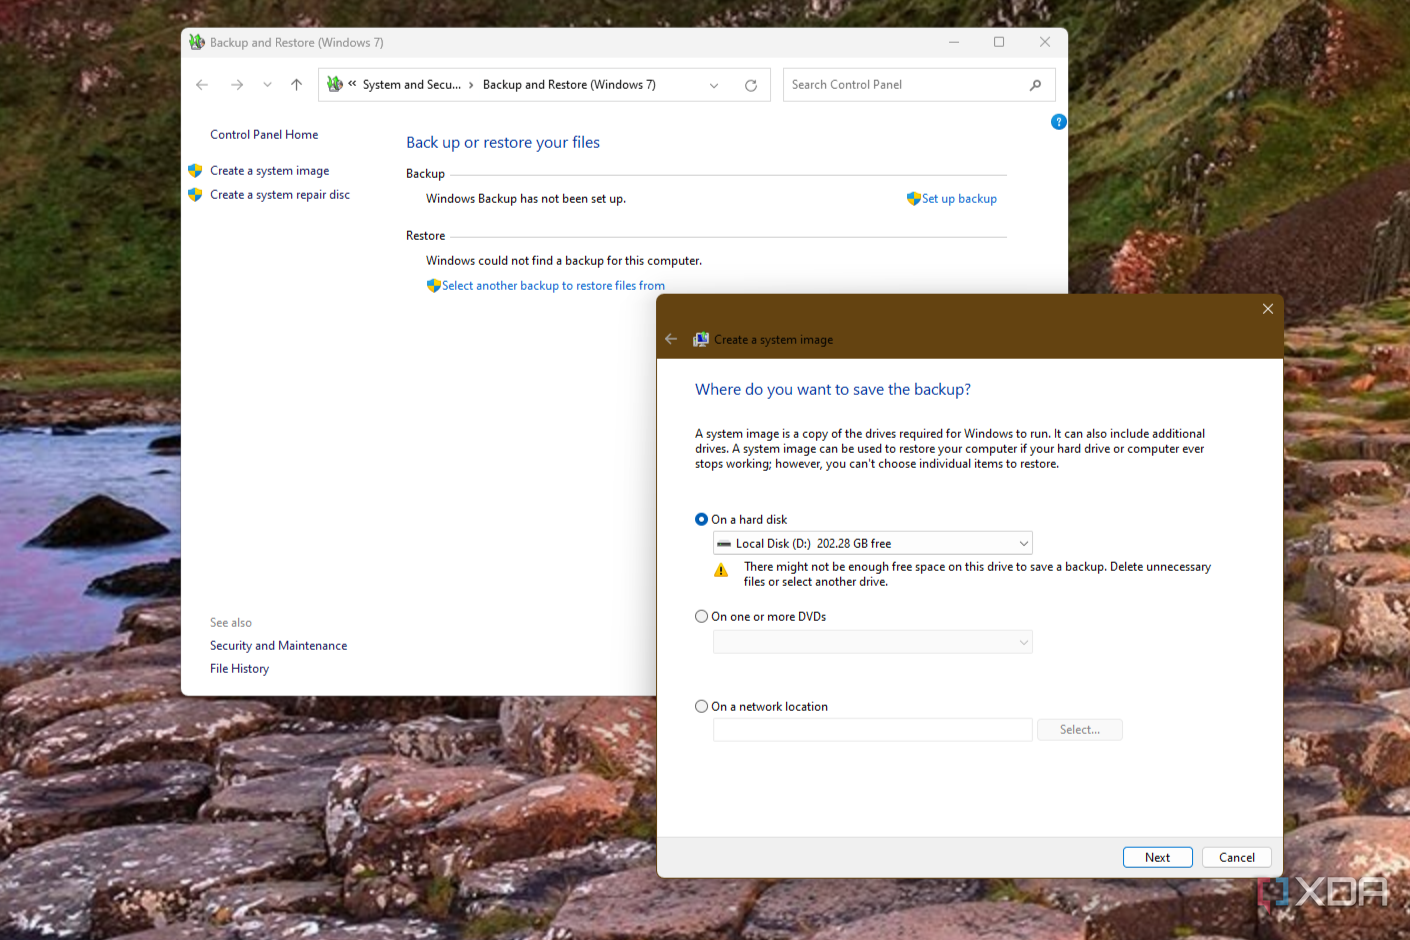
- Choose Create a system image.
- Pick the location where you want to save the system image, and then choose Next.
- You can select or deselect drives that you don't want to be included in the backup. Then choose Next.
- Then click Start Backup. The backup will take a while.
Once the backup is complete, you'll be notified of when it's ready.
How to restore from a system image backup
To restore from this backup, you're going to have to reboot your PC.
- If your PC is bootable, plug the HDD or SSD with the system image into your PC.
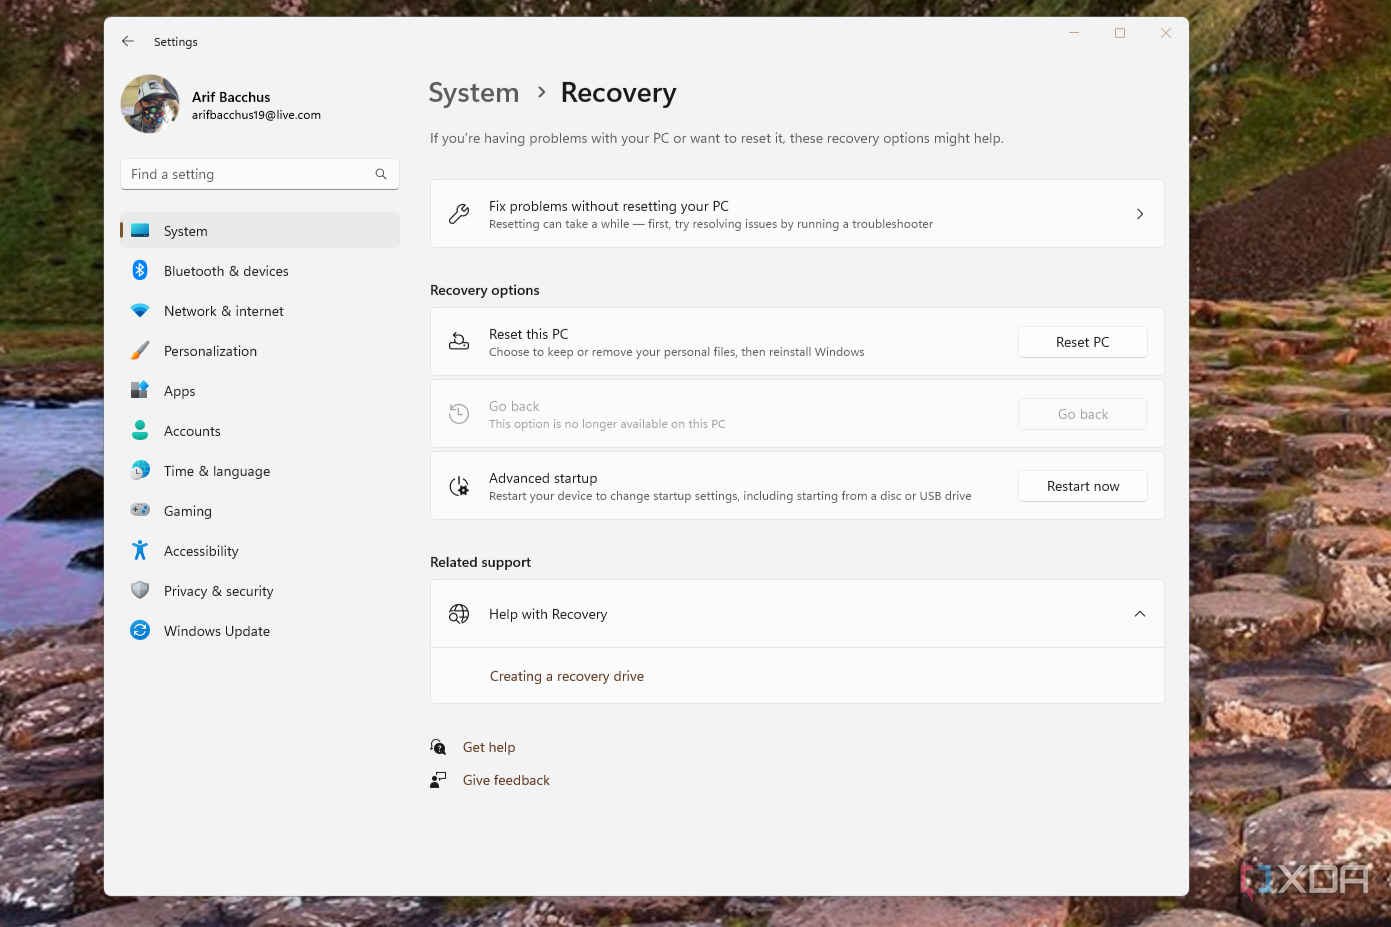
- Head to Start > System > Recovery.
- Click Restart now under Advanced Startup.
- Once your PC reboots, choose Troubleshoot.
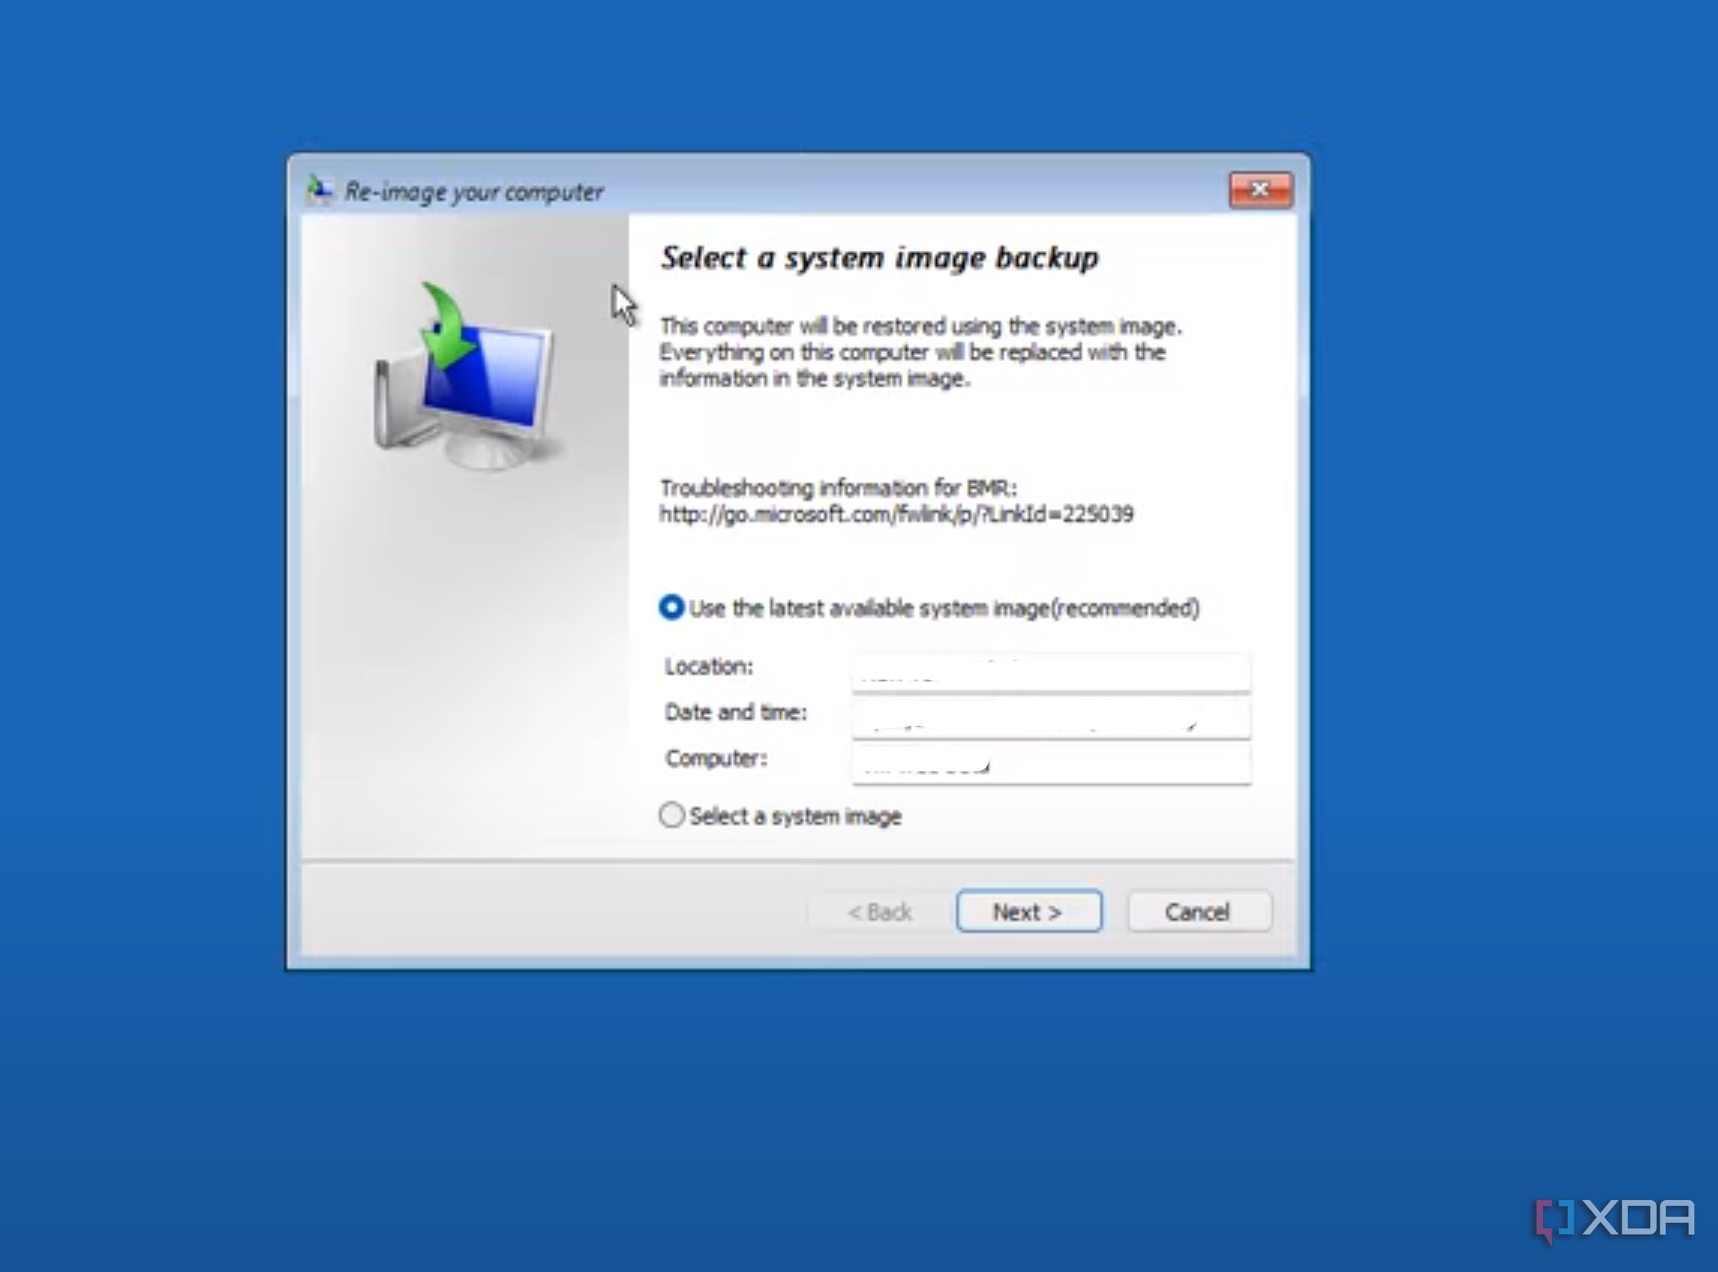
- Choose Advanced options > See more recovery options > System Image Recovery.
- Follow the steps on the screen, making sure you choose Format and Repartition disks.
In the event your PC is not bootable and you have to reinstall Windows, you can restore from this image. Here's how:
- Boot from the Windows 11 installer.
- Choose Repair your computer.
- Go to Troubleshoot > System Image Recovery.
- You'll be prompted to pick your HDD or SSD from a list. Press Next and follow the steps on your screen.
Those are the best ways to keep your Windows 11 laptop backed up but do note that Microsoft is currently working on a dedicated Windows Backup app for Windows 11. This app will let you see your current backup status, create a new backup of your laptop, and backup settings, apps, and credentials. It's currently in testing in the Dev channel and Beta channels, which is why we've excluded it from this list. The app will help you restore app pins, settings, and desktop apps that are available in the Microsoft Store. We'll do our best to keep this guide updated once it launches.
-
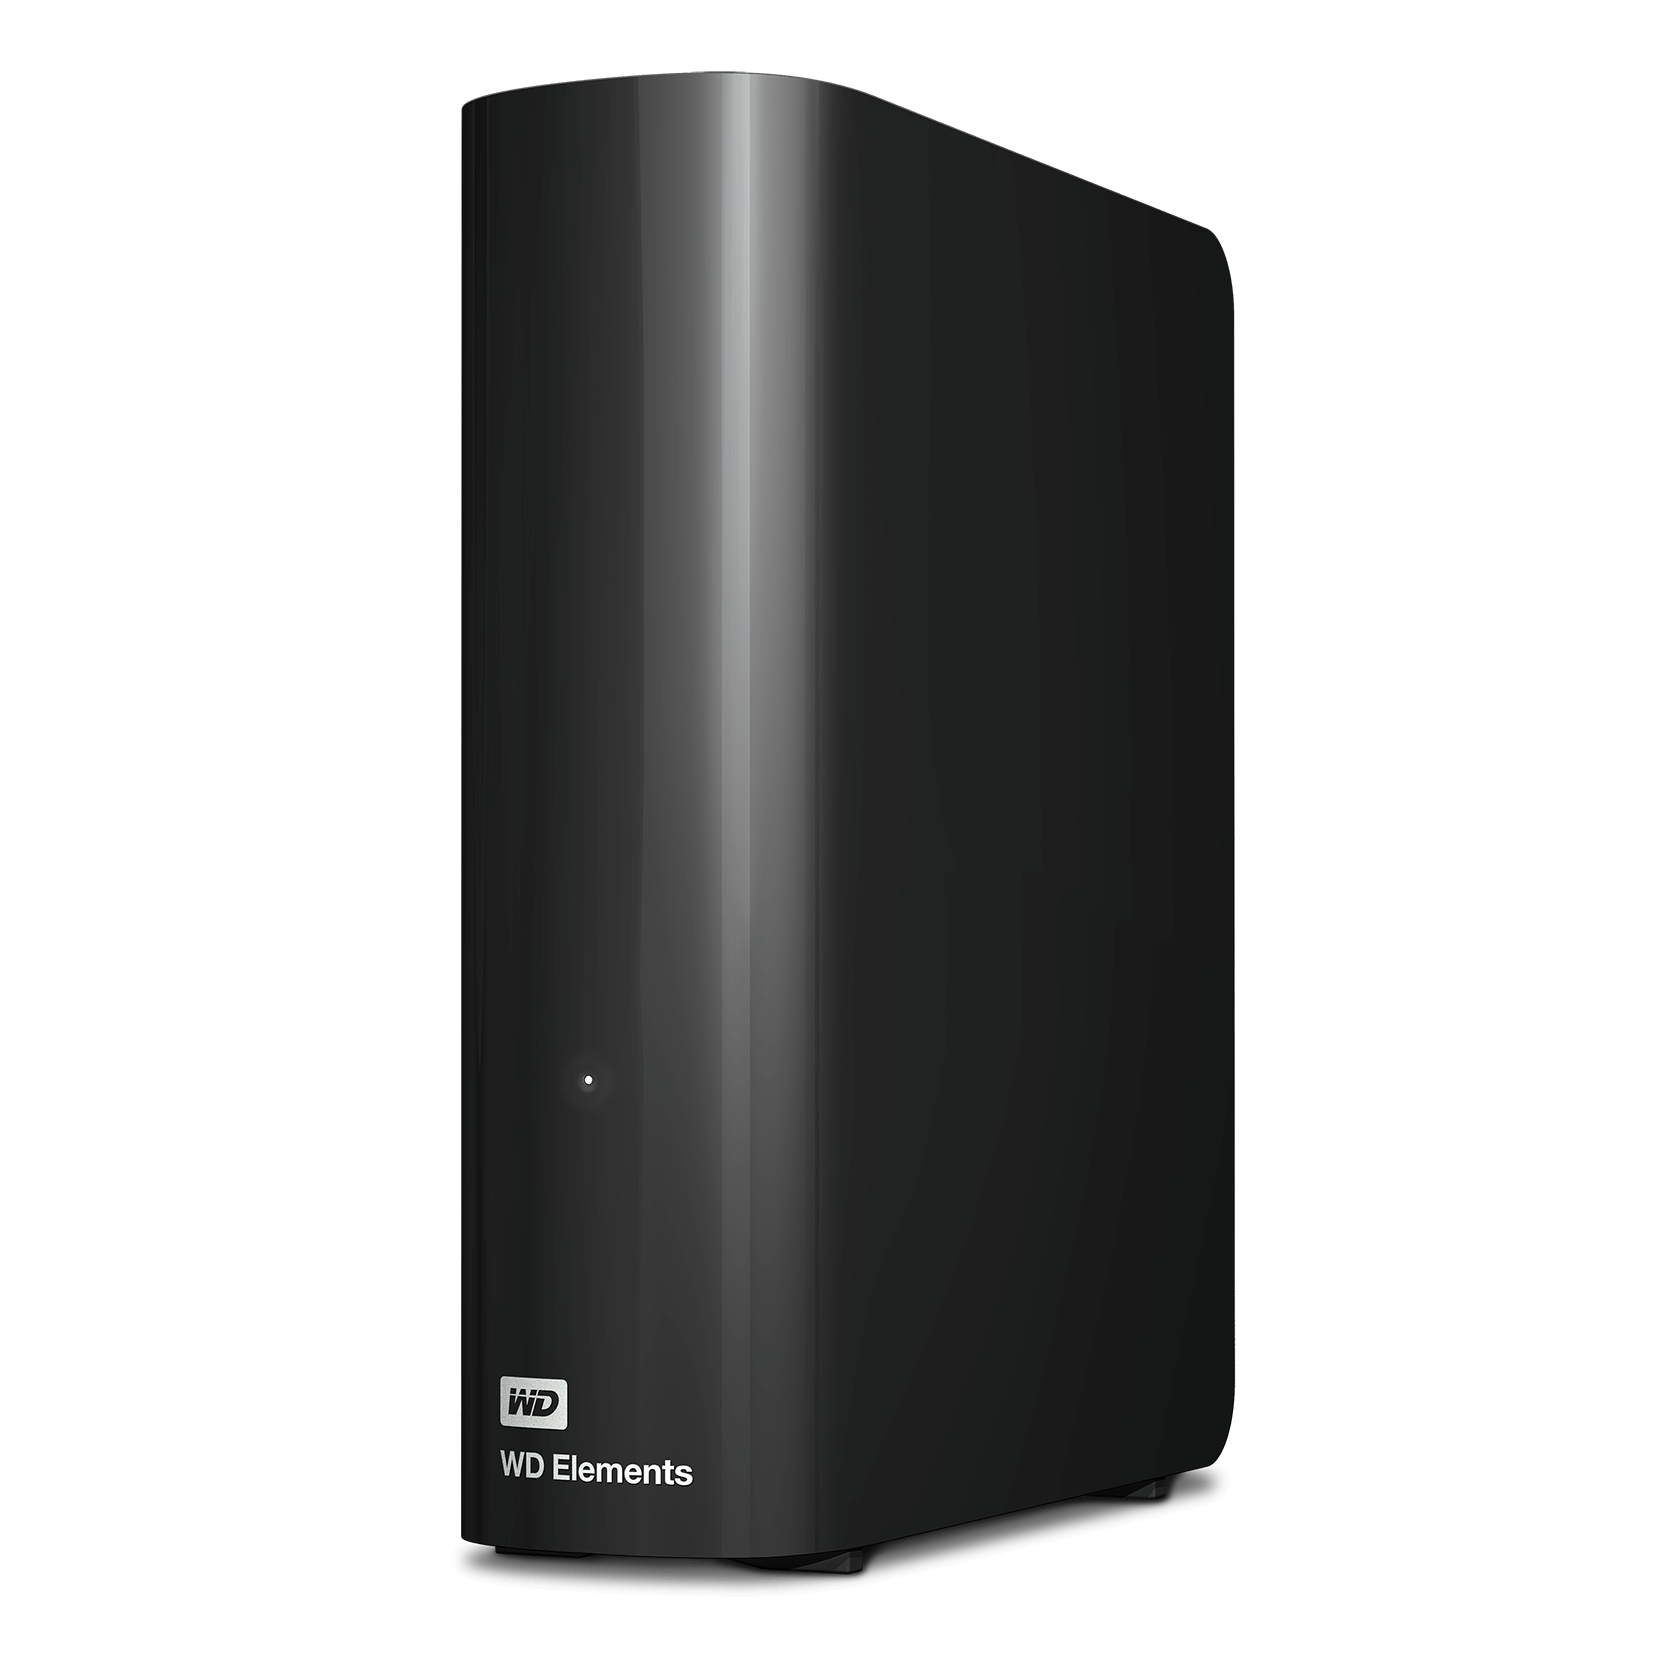
WD Elements Desktop HDD
When you pile up a lot of files over the years, you might want to keep them in a safe location, separate from your computers. An HDD like this isn't very fast, but it gives you a lot of space for a very low price compared to an SSD.
-
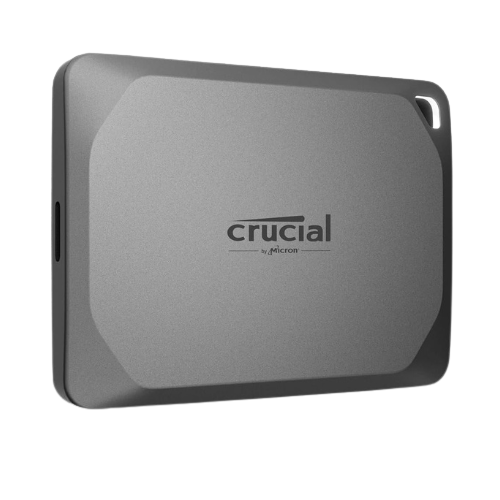
Crucial X9 Pro portable SSD
If you need a fast, durable, and portable SSD for your Acer Swift Go laptop, the Crucial X9 Pro SSD is one of the best options. It has fast read and write speeds and comes with a USB-C cable right out of the box. This SSD is also splash and dustproof, so photographers, creatives, and traveling business professionals can use it in multiple conditions.

