There might come a time when you have to share your laptop, or your Windows 11 PC with someone. In the old days of Windows, there was a dedicated guest mode for these situations, but Windows 11 and Windows 10 have since removed this. It doesn't mean you can't manually add a guest account, though.
From the settings app, you can add a separate account for a guest. You can then change the permissions to prevent the guest account from accessing your files. We have your back, though, with the best possible ways to make that guest account on Windows, even covering advanced methods like the Command Prompt.
How to create a guest account on Windows 11 through the settings app
The Windows 11 settings app will let you add a new user account to your PC that you'll be using in place of a guest mode. While you can't name this new user "Guest" since Windows won't allow it, you can give it a different name like "Guest User." You'll need to be an administrator to follow these steps, but here's how.
Add the account to the Windows
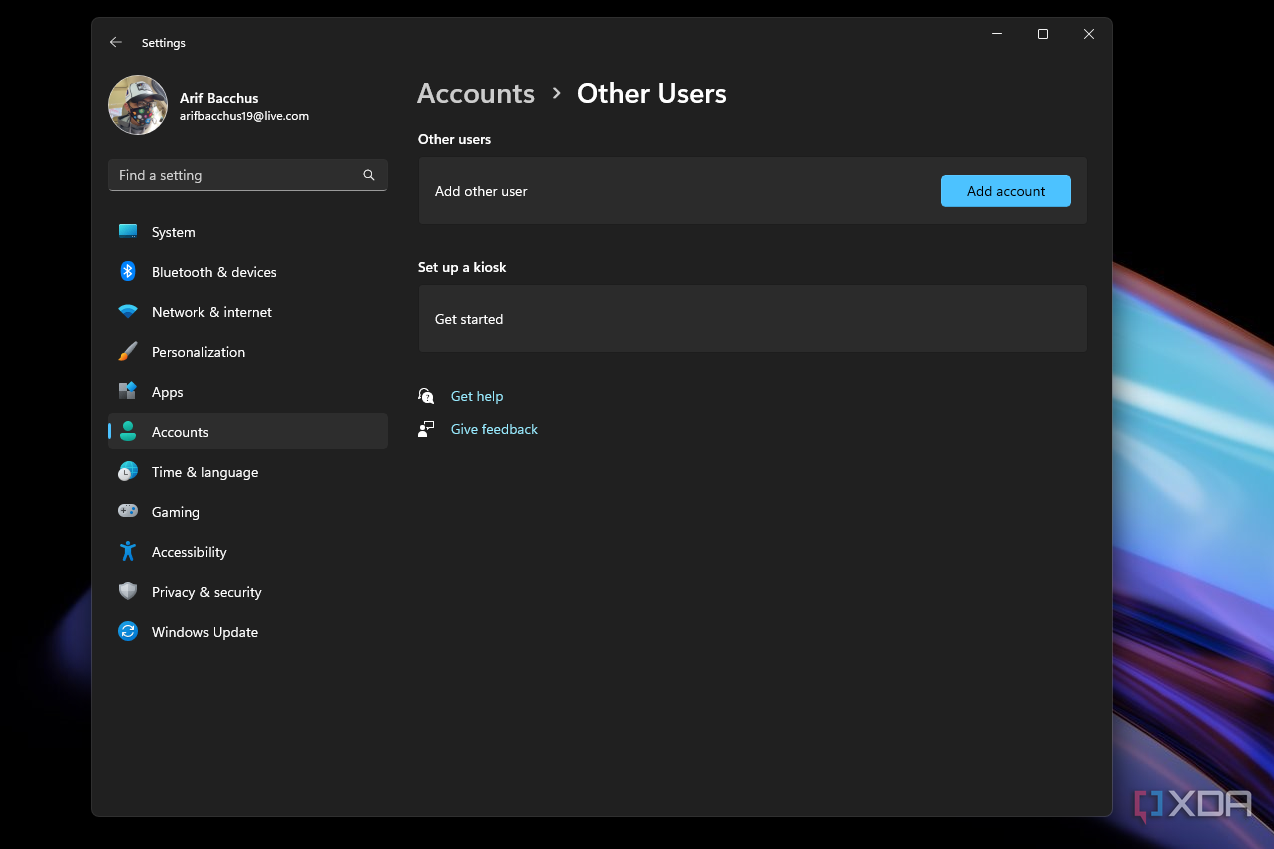
- Open the Windows 11 Settings app with Windows Key + I on your keyboard.
- Choose Accounts in the sidebar.
- Choose Other users.
- Choose Add Account.
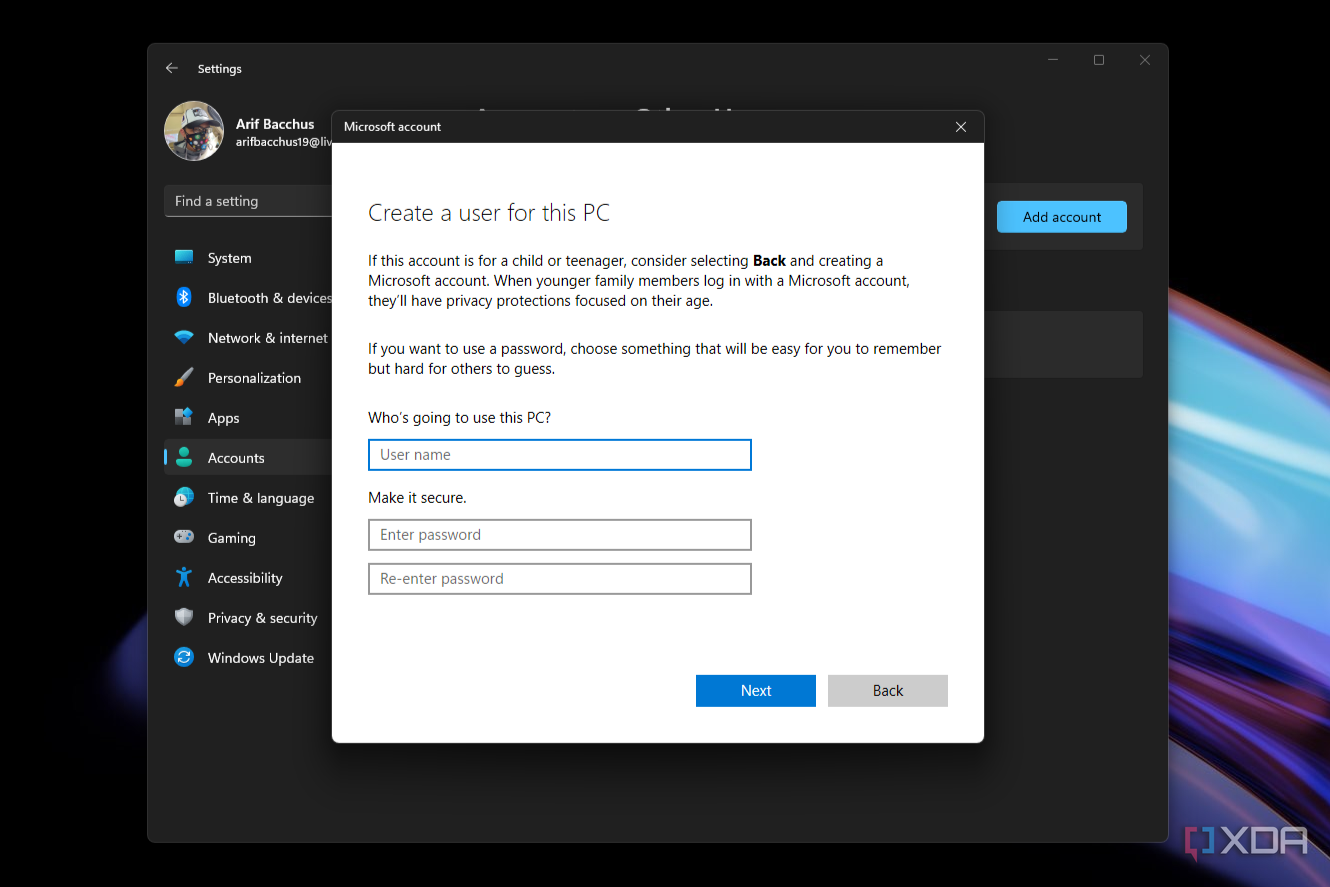
- Click I don't have this person's sign-in information.
- Click Add a user without a Microsoft Account.
- Add a name, such as Guest user.
- Add a password if you want.
Once this is complete, you'll have a separate standard account on your PC for a guest to use. By default, this standard account should still restrict access to other user's files. But if you want to be safe, you can still manually restrict the account to what the full guest mode in older versions of Windows would have add.
Change the account permissions on Windows 11 Home
If you've just added a guest account and you're running Windows 11 Home, you'll want to ensure that it's truly a guest account by stripping the account of some permissions. For this, you can use a third-party tool.
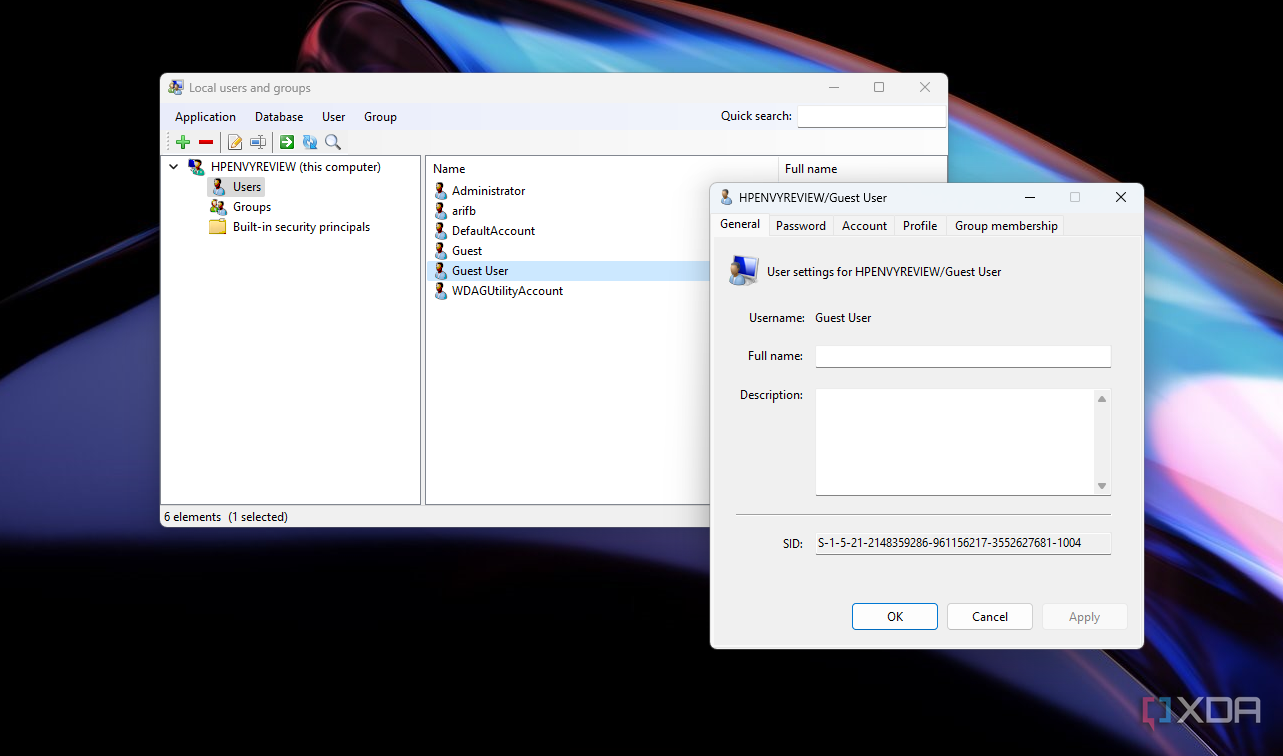
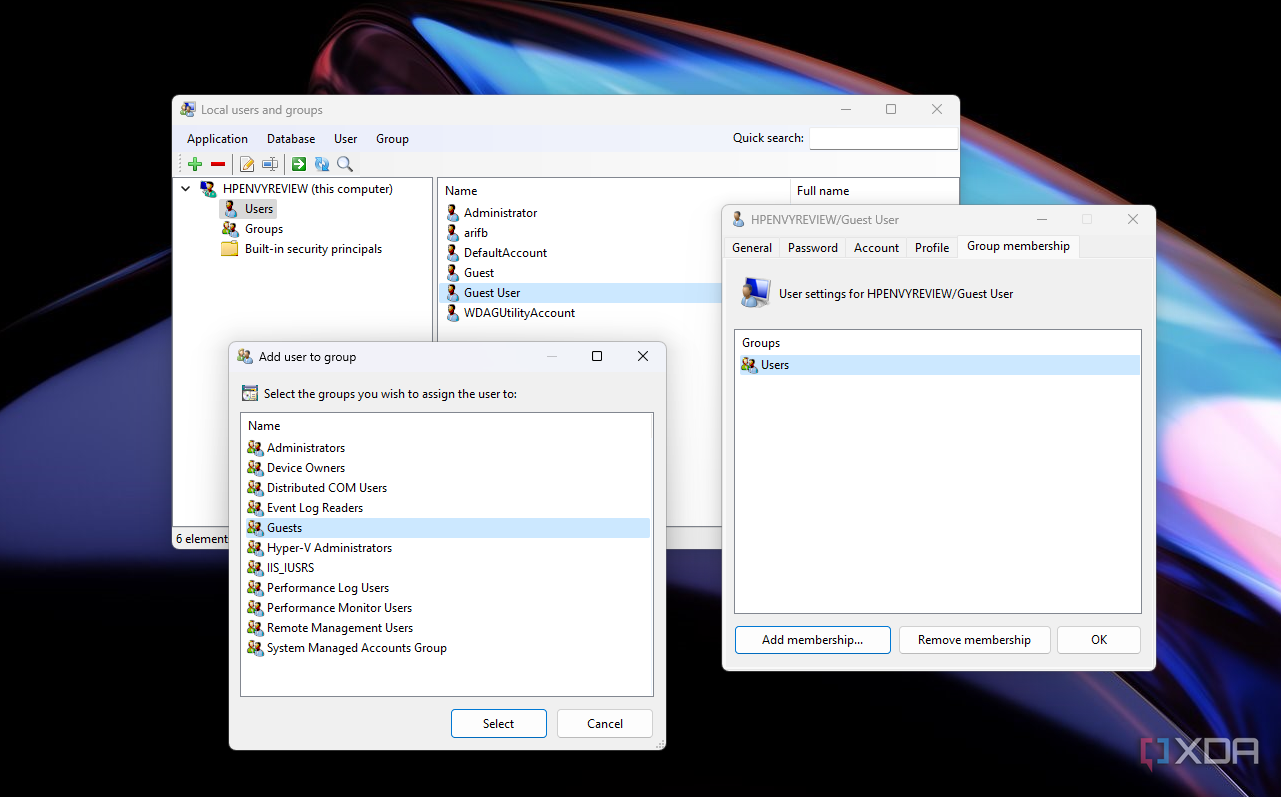
- Go to GitHub and download the Local User and Group Management Tool.
- Launch the tool.
- Navigate to Users, then double-click on the name of the user you created earlier.
- Choose Group Membership, then Add membership.
- Choose Guests, then click Select.
- Highlight Users and press Remove Membership.
- Press OK.
Change the account permission on Windows 11 Pro and higher
If you're running Windows 11 Pro and higher and just made that guest account, you won't need a third-party tool. You can manually use the Computer Management tool for this task. Here's how.
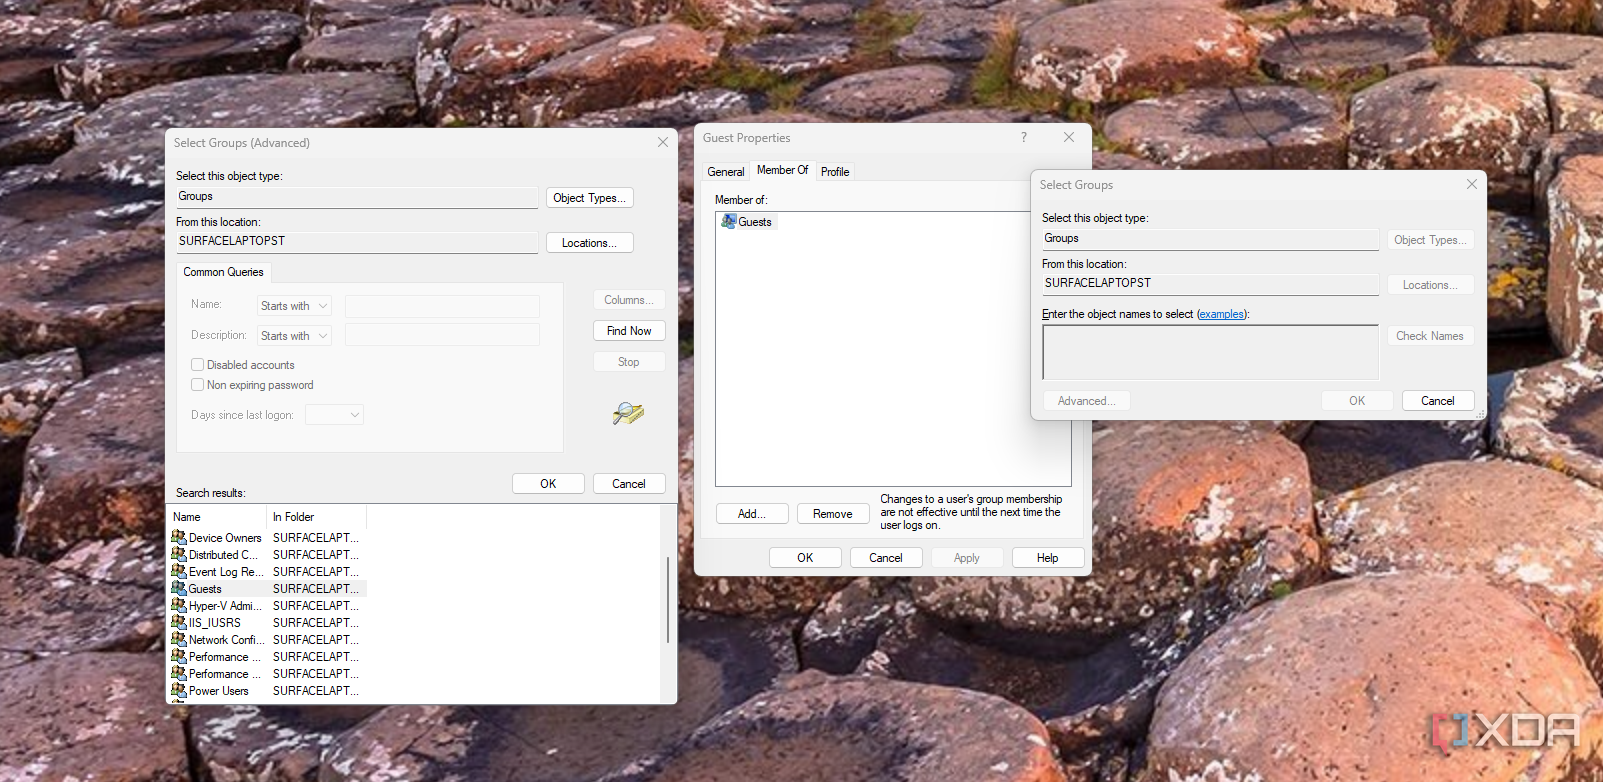
- Search for Computer Management in the Start Menu and click the top result.
- Click System Tools > Local Users and Groups > Users.
- Right-click on the account that you've added and choose Properties.
- Click Member of > Add > Advanced.
- Choose Find now > Guests.
- Click OK, then Okay, then select the Users group and choose Remove.
- Click Apply and then OK.
How to create a guest account on Windows 11 through Command Prompt
More experienced Windows 11 users might want to create a guest account through the Windows 11 Command Prompt. This accomplishes the same as going through the Windows 11 settings app and removing the permissions.
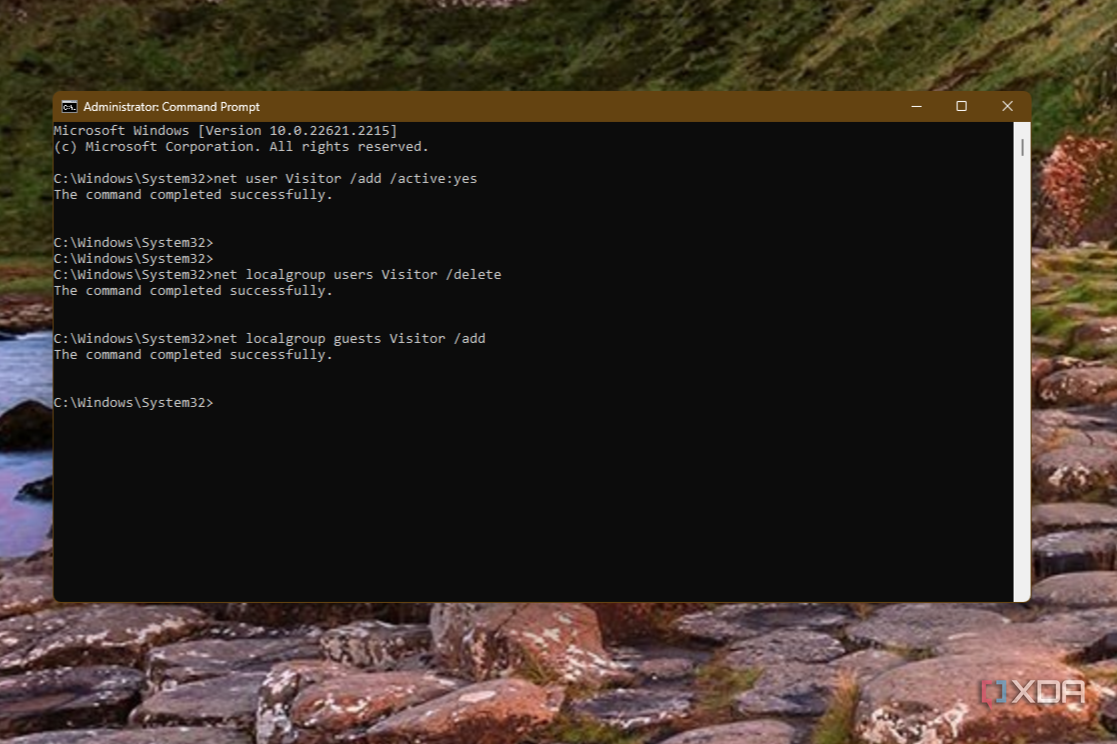
- Search the Start Menu for Command Prompt and choose Run as Adminstrator.
- Type this command: net user Visitor /add /active:yes
- If you want to add a password, type net user Visitor * and the password then press Enter on your keyboard.
- Otherwise, just press Enter twice to skip a password.
- Ensure the user won't have access to other files by typing this command and pressing Enter: net localgroup users Visitor /delete
- Complete the setup by typing net localgroup guests Visitor /add and then pressing Enter.
After this is complete, you can head to the login screen to pick the guest account. This account won't have any access to other user files, and will be safe to use.
Once you follow any of these steps above, your PC will be up and running with an alternate to a guest account. It will show up on the login screen, just as any other account would. This can be particularly useful in a situation where a great laptop for students might be shared with multiple individuals. Or, in a family, where you don't want accounts accessing each other's data and files.

